

Welcome
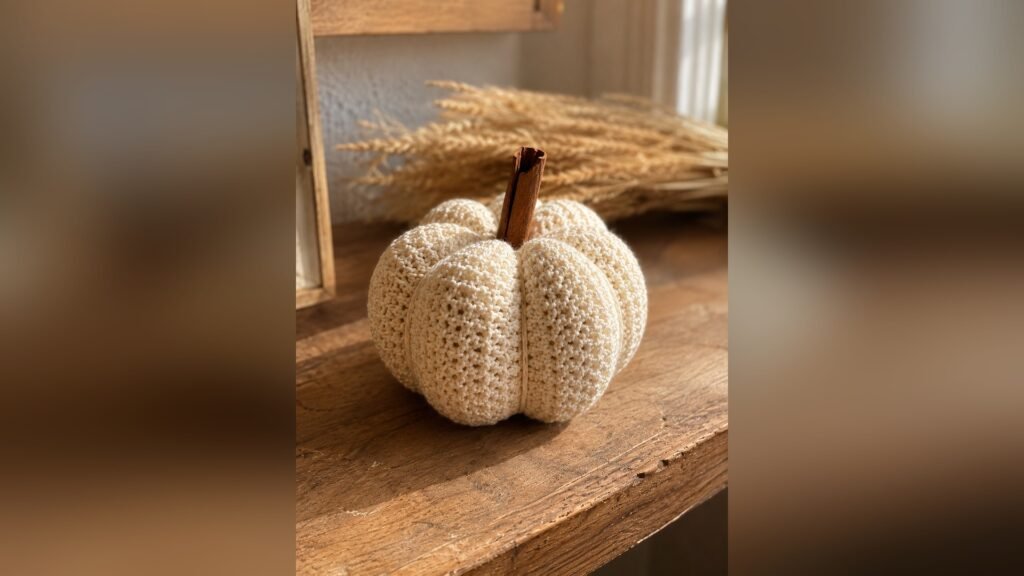
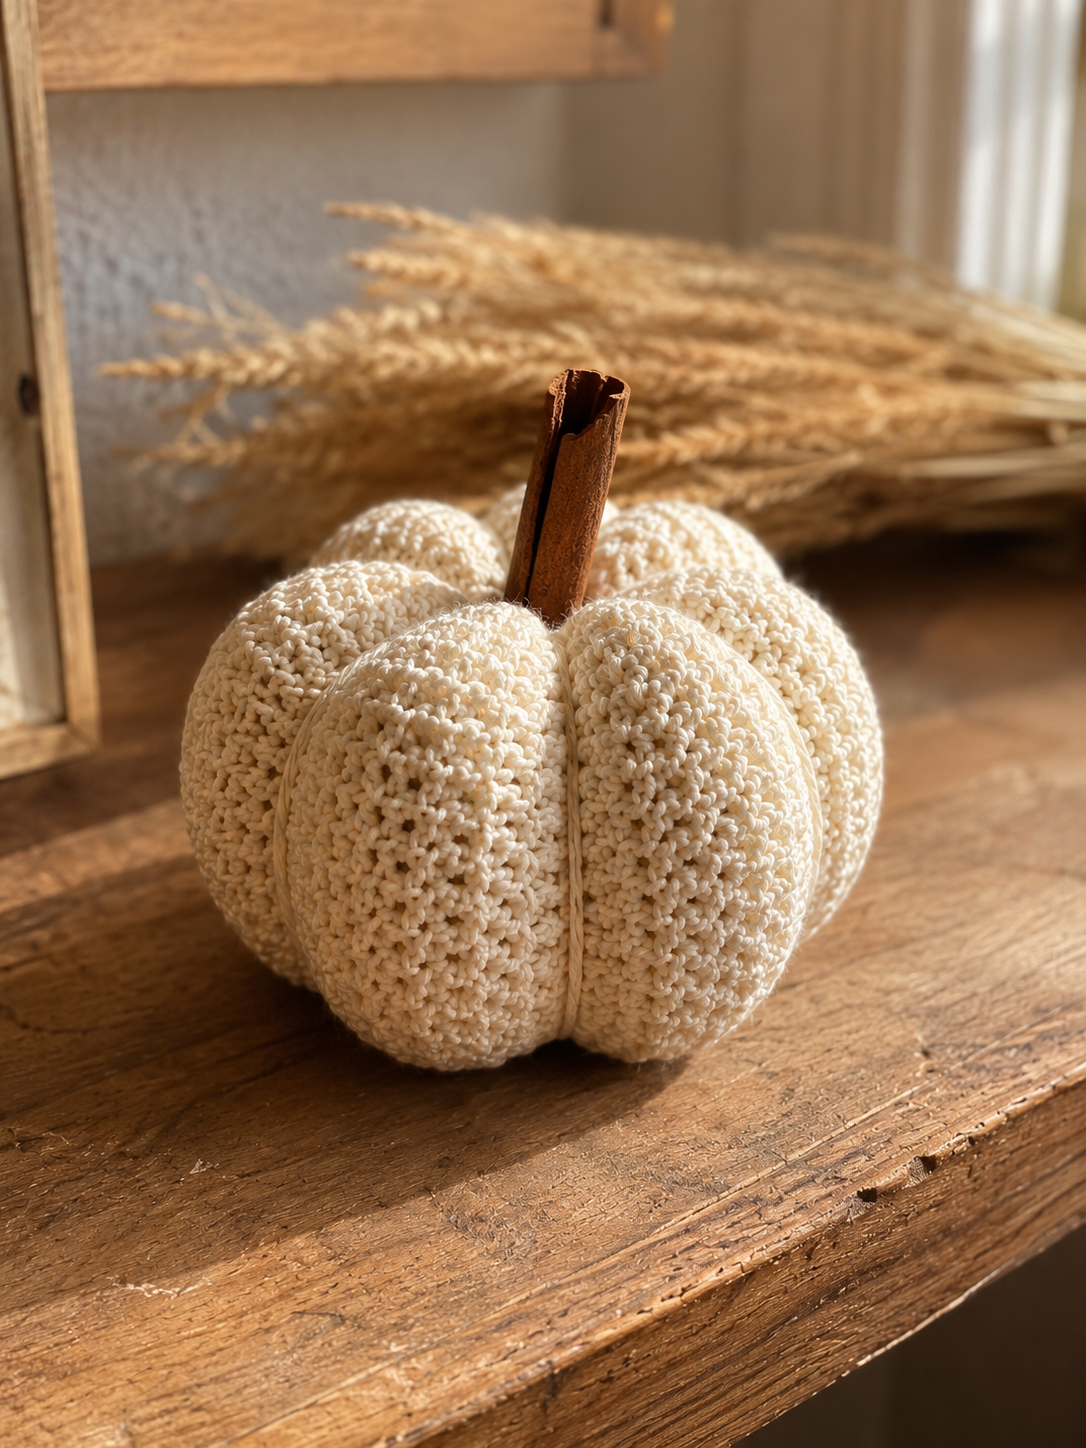
This crochet pumpkin pattern is a complete beginner-friendly guide to making a beautiful farmhouse pumpkin from start to finish. Read this page first. It explains why this pumpkin is built the way it is, and once you understand the reasoning, every round that follows will make sense.
Most beginner crochet pumpkins are worked as a simple ball with ribs pulled around it. That approach works, but it produces a pumpkin that sits on a rounded bottom and rolls when you put it down. The ribs also tend to look uneven because they are added as an afterthought, not built into the structure.
This pattern takes a different approach. It builds the pumpkin from the top down as a proper shape with a flat opening at the top, straight sides, and a controlled decrease at the bottom. The result is a pumpkin that stands up on its own, has a natural place for a stem, and takes ribs beautifully because there is real structure to pull them against.
There is a second reason this design works. The stitch count on the widest round is a multiple of six, which is what creates the six evenly-spaced ribs that give a pumpkin its recognizable shape. If you try to shortcut this by using a different count, you will find your ribs land in the wrong places and the pumpkin will look off. Every number in this pattern is there for a reason.
The Four Parts of This Pumpkin
The pumpkin you are about to make has four distinct parts, and each one has a specific job:
The top disc is the flat circle at the top of the pumpkin. It gets worked first and it is what you will build everything else from. The size of this disc determines the finished width of the pumpkin, so if you want a bigger pumpkin, you make a bigger disc.
The straight sides are the walls of the pumpkin. This is where all the height comes from. More rounds equal a taller pumpkin. Fewer rounds equal a squat one.
The decreased bottom closes the pumpkin off. Because you decrease gradually, the bottom curves inward and looks natural.
The ribs and stem are added at the very end. This is the finishing that turns a stuffed ball into a pumpkin. Take your time here because these details are what people actually notice.
The top disc, sides, and bottom are worked as one continuous piece with no seams. Only the ribs and stem are added separately.
If You Are Brand New to Crochet
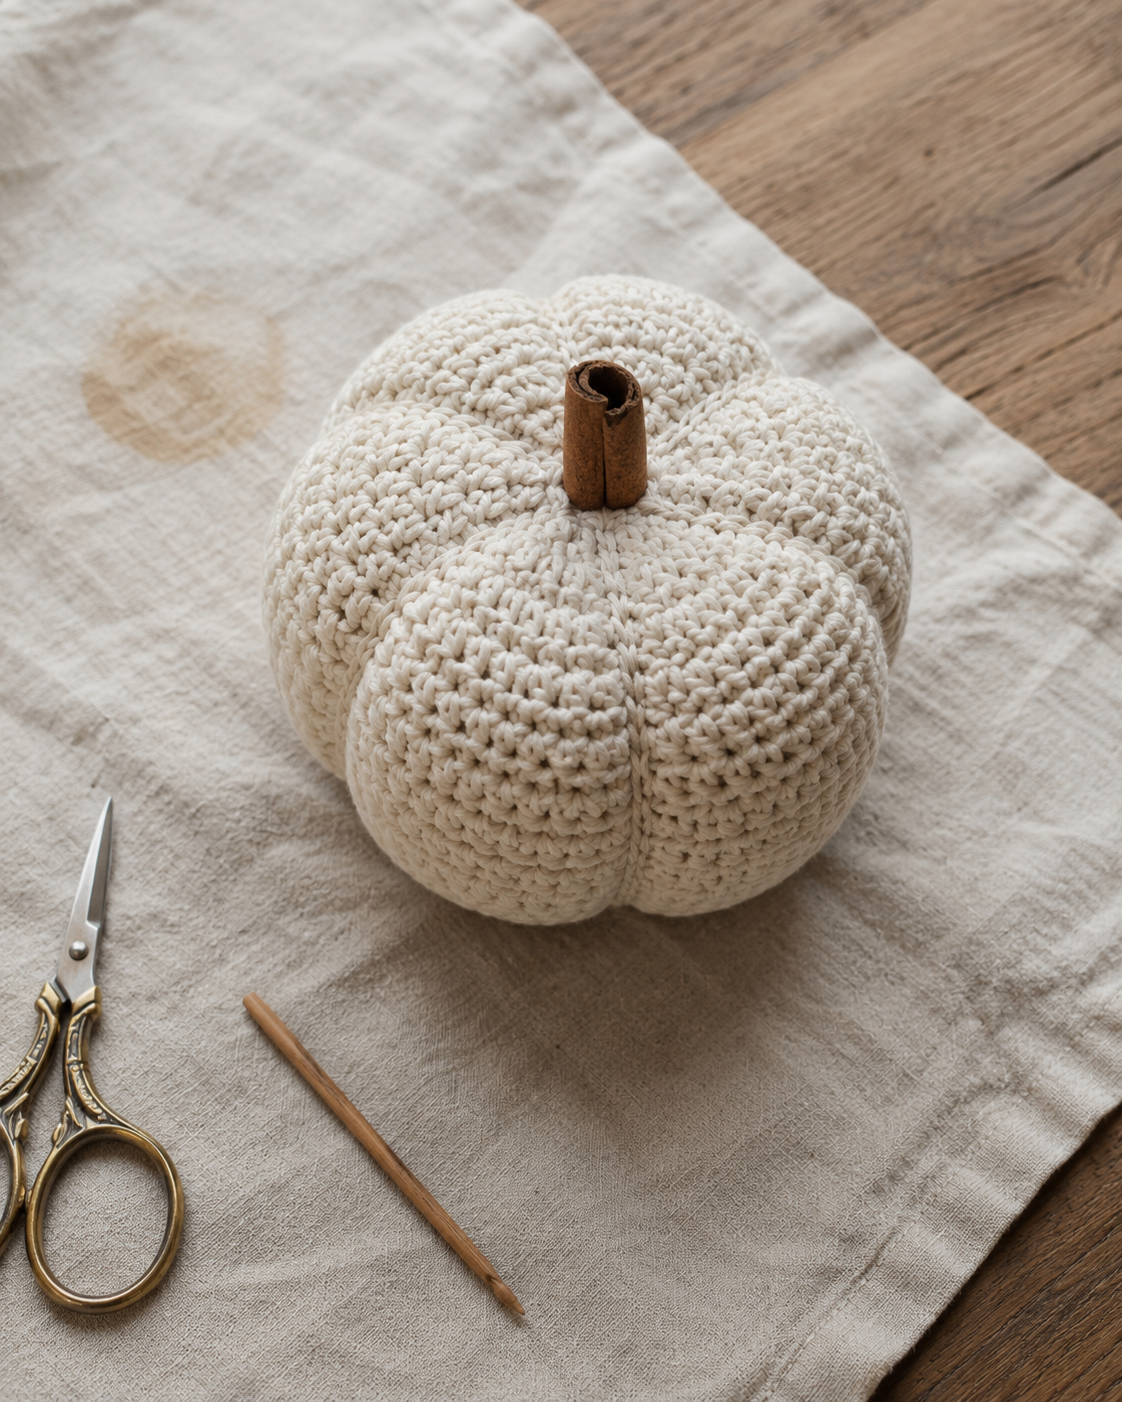
Do not skip the “Stitches You Need” section. Every stitch in this pattern is one of the five most basic crochet stitches, and if you spend twenty minutes learning them properly before starting, the actual pumpkin will feel easy.
Make the base slowly and check it against a flat surface before you move on. This is the one part of the pattern where mistakes are hard to fix later.
The sides are the same single crochet stitch over and over for about fifteen minutes. This is the part where you can watch something on your phone and not think about counting at all.
If You Have Crocheted Before
The only page worth reading carefully is the section on making the ribs, because getting even ribs is the difference between a pumpkin that looks handmade in the good way and one that looks handmade in the bad way. The construction is straightforward and you can probably work from the quick reference sheet at the end.
What Is in This Pattern
This crochet pumpkin pattern is a complete beginner-friendly guide with everything you need to make one classic farmhouse pumpkin from start to finish.
The Sizes You Can Make
The instructions are written for a medium farmhouse pumpkin, which is the size that looks best on most surfaces. However, the same construction method works for any size. Adjustments for smaller and larger versions are given at the end.
| Size | Finished Width | Finished Height | Yarn Amount | Time |
|---|---|---|---|---|
| Small | 6-7 cm (2.5-3 inches) | 5-6 cm (2 inches) | 25g | 45 min – 1 hour |
| Medium (main pattern) | 10-11 cm (4 inches) | 8-9 cm (3.5 inches) | 45g | 1.5-2 hours |
| Large | 14-15 cm (6 inches) | 12-13 cm (5 inches) | 80g | 2.5-3 hours |
What This Pattern Assumes
You know how to hold a crochet hook and make basic loops. If you have never picked up a hook, spend one afternoon on a YouTube tutorial for absolute beginners, practice chaining and single crochet for thirty minutes, and then come back to this pattern.
You have never made a pumpkin before. Every part is explained. If a section feels obvious, skip ahead.
You want a pumpkin that actually looks like a pumpkin. This is not a shortcut pattern. It takes about two hours and produces a piece you would be proud to display or gift.
What Is Not in This Pattern
Advanced stitchwork. Every stitch here is the most basic type.
Multiple color changes. This is a one-color pumpkin. Color variations are discussed at the end.
Complicated finishing. The ribs are simple wraps and the stem is either a real cinnamon stick or a simple crochet tube.
The Yarn You Need
The yarn you choose for your crochet pumpkin pattern matters more than you might think.. It affects the size of the finished pumpkin, how well it holds its shape, and whether it still looks nice after a year of being taken out for fall.
Best Yarn Choice: Worsted Weight Cotton
Worsted weight cotton (labeled as size 4 or medium) is the best choice for crochet pumpkins for four reasons.
First, cotton has clean stitch definition. The individual stitches show up crisply, which is what makes the ribbed texture of a pumpkin look intentional rather than muddled.
Second, cotton holds its shape. A stuffed cotton pumpkin will look the same in five years as it did on the day you finished it. It will not sag, stretch out, or lose its structure.
Third, cotton takes color beautifully. The traditional pumpkin colors (rust, orange, cream, sage, dusty pink) look richer in cotton than they do in acrylic.
Fourth, cotton has a natural, matte finish that reads as premium. A finished cotton pumpkin looks like something you would buy in a boutique, not something you would find in a craft store bin.
The recommendation is 100% cotton in worsted weight. Brands that work well include Lily Sugar’n Cream, Bernat Handicrafter Cotton, Paintbox Yarns Cotton DK (doubled), or any local worsted weight cotton from your yarn shop.
Alternative: Wool or Wool Blend
Wool gives a slightly softer, cozier look than cotton. If you want your pumpkin to feel warm and rustic rather than crisp and structured, wool is a good choice.
The downside is that wool can felt over time if it gets damp, and it can attract moths in storage. If you go with wool, store your finished pumpkins in a sealed plastic bin with a sachet of cedar chips.
Alternative: Acrylic
Acrylic yarn is the cheapest option and it is easy to find at any craft store. A pumpkin made from acrylic will look nice, and if this is your first crochet pumpkin, there is no reason not to use it.
The tradeoff is that acrylic loses its shape faster than cotton. Under the weight of stuffing and a year of being handled, an acrylic pumpkin will start to look a little tired. This is fine for a first project or for pumpkins that are essentially disposable, but for pieces you want to keep for a long time, cotton is worth the extra cost.
What to Avoid
Bulky and super bulky yarn will produce a much larger pumpkin than the pattern describes. If you want that oversized chunky look, using bulky yarn is fine, but the finished size will be different from what is written.
Fingering and DK weight yarn will produce a smaller pumpkin. This is also fine if you know what you want, but you will need many more rounds to reach the same height.
Novelty yarns like eyelash yarn, chenille, or fun fur are difficult to work with and hide the stitch definition that makes the pumpkin look ribbed. Save these for other projects.
Yarn Colors That Work
The color you choose changes the entire feel of the pumpkin.
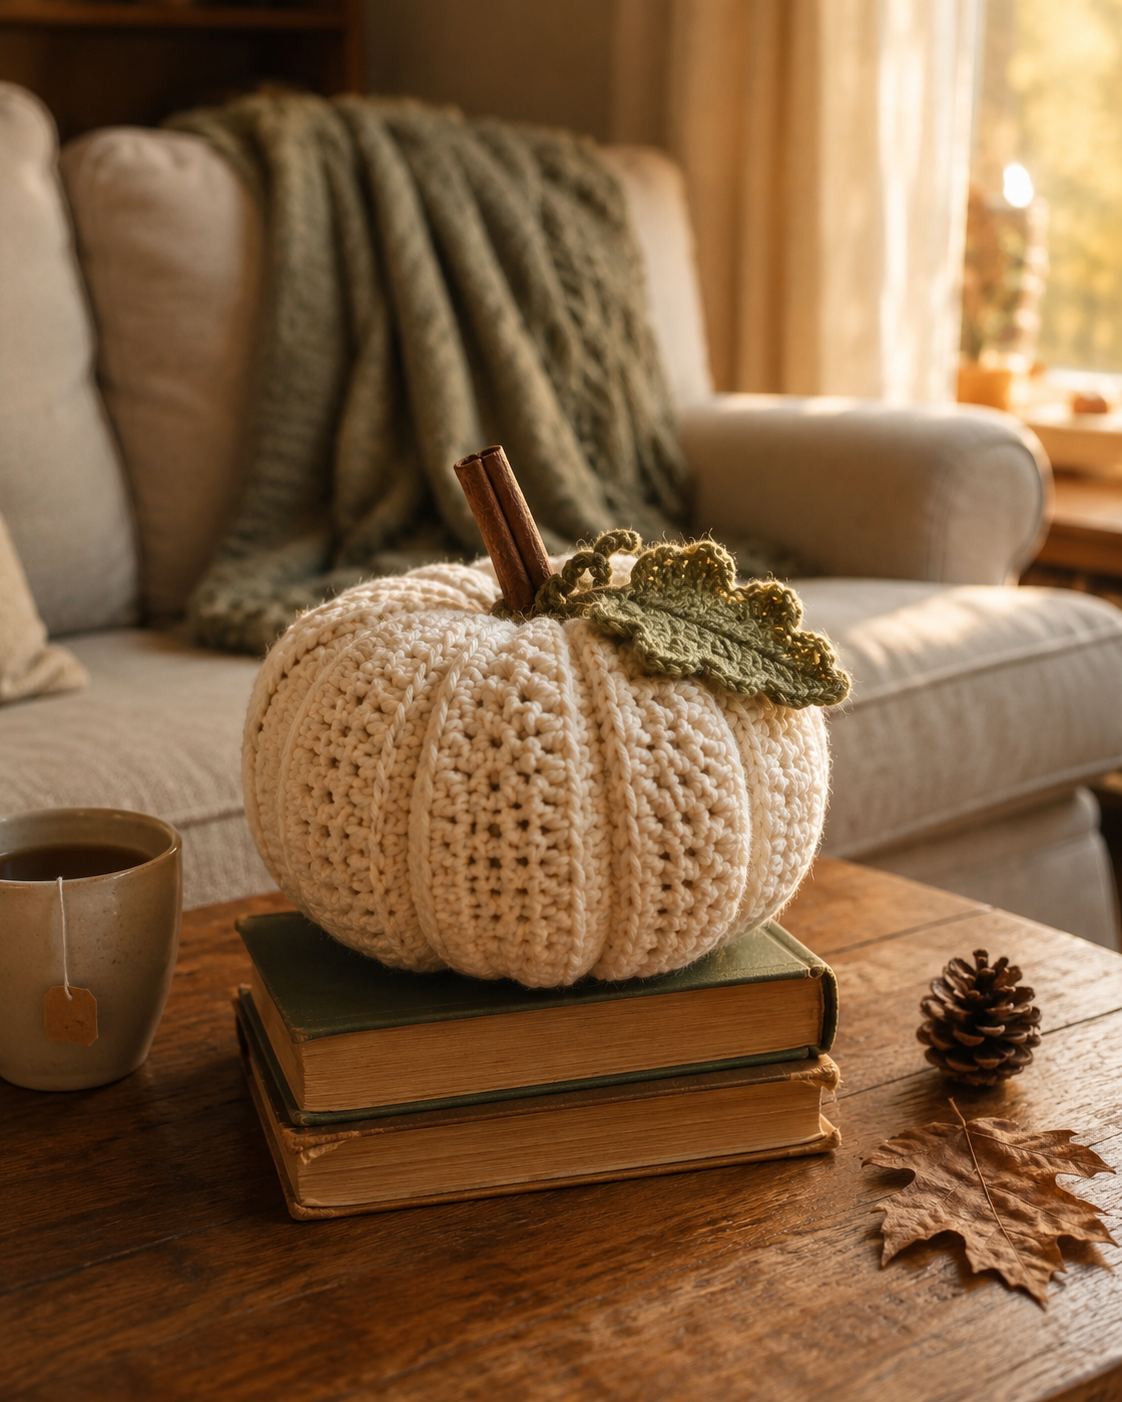
Cream or oatmeal produces a farmhouse look that fits any decor. This is the color used in the photos and it is the color that works best if you are only going to make one pumpkin.
Rust or burnt orange gives a classic autumn look that reads as traditional fall decor. Beautiful in group displays with other pumpkins.
Sage green is a modern choice that has become popular in recent years. Works beautifully with terracotta and dusty pink for a soft fall palette.
Dusty pink or blush creates a soft, feminine pumpkin that looks great in bedrooms or on styled shelves.
White is clean and modern. Best in groups of three in different sizes.
Charcoal or black is unexpected and reads as elevated and adult. Pair with a light-colored stem for contrast.
For your first pumpkin, cream is recommended because it forgives any small mistakes and looks good in any home.
Hook, Tools and Extras
You need very little to make this pumpkin, and most of it you probably already have.
Hook
A 5.5 mm hook (US size I/9) is the standard choice for worsted weight cotton yarn. This hook size produces a fabric that is firm enough to hold stuffing without stretching, but not so tight that your hand cramps.
If you crochet loosely (your stitches tend to be big and floppy), go down to 5.0 mm (US size H/8). A loose fabric will let stuffing show through and the finished pumpkin will look unstructured.
If you crochet very tightly (your stitches feel dense and hard), go up to 6.0 mm (US size J/10). A tight fabric is difficult to work with and will make the pumpkin smaller than the pattern says.
For your first pumpkin, start with 5.5 mm. You can always adjust for your next one.
Stitch Marker
Not optional. This pumpkin is worked in a continuous spiral, which means you never join at the end of a round. There is no visual marker to tell you where one round ends and the next begins.
Any marker works: a proper crochet stitch marker, a safety pin, a paper clip, or a small piece of contrast yarn tied through the first stitch. You will move this marker up to the first stitch of every new round.
Losing your place in a spiral is the single most common mistake beginners make, and it is entirely preventable with a marker.
Yarn Needle
A blunt-tipped needle with a large eye. This is what you will use to close the bottom of the pumpkin, weave in ends, and make the ribs.
Metal needles are best because they slide through cotton smoothly. Plastic needles work but tend to snag on cotton fibers.
Scissors
Any small, sharp scissors work. Kitchen shears are fine.
Stuffing
Polyester fiberfill, sold as poly-fil, stuffing, or pillow filling at any craft store. One small bag will stuff about ten medium pumpkins.
Alternatives include scrap yarn, torn-up fabric scraps, or shredded paper. All of these work fine but polyester fiberfill gives the most professional finish.
Do not use rice, beans, or anything organic. They attract insects and mold over time.
Optional: Stem Materials
Real cinnamon sticks are the classic choice. They smell like fall for weeks and add a rustic, natural look. Break them to the length you want. Available at any grocery store in the spice aisle.
Small twigs collected from your yard, cleaned and dried, make excellent stems. Look for pieces about the thickness of a pencil.
Wine corks cut in half and painted brown are a quick alternative if you have them lying around.
Wooden dowels from a craft store, cut to size and stained brown, produce a very neat stem for a polished look.
Crochet stems made from brown yarn (instructions given later) are the cleanest option if you want everything to be crochet.
Optional: Extras
A fabric marker or small pieces of contrast yarn to mark the rib positions before you start sewing them. Highly recommended.
Hot glue for securing the stem into the pumpkin. Not strictly needed but helpful.
Fabric leaves in silk or felt to attach at the base of the stem. Available cheap at craft stores in the fall floral section.
Gauge, Size and Abbreviations
Gauge
Gauge matters here because it determines the finished size of your pumpkin. This does not need to be a formal swatch. The first few rounds of the base will tell you if your gauge is close enough.
Target gauge: 14 sc stitches x 15 rounds = 10 cm x 10 cm (4 inches x 4 inches) with worsted weight cotton and a 5.5 mm hook.
After you finish Round 5 of the base, measure the diameter of your circle. It should be about 8 cm (3.25 inches) across. If it is a lot bigger or smaller, adjust your hook size and start again. Ten minutes now saves an hour later.
Finished Measurements (Medium Size)
| Measurement | Size |
|---|---|
| Top disc diameter | 10-11 cm (4 inches) |
| Height at the sides | 6-7 cm (2.5 inches) |
| Total height with stem | 12-14 cm (5 inches) |
| Circumference at widest point | About 34 cm (13.5 inches) |
| Weight when finished | About 45 grams |
Abbreviations (US Terms)
| Short | Meaning |
|---|---|
| ch | Chain |
| sc | Single crochet |
| inc | Increase (2 single crochets in the same stitch) |
| sc2tog | Decrease (single crochet 2 stitches together) |
| sl st | Slip stitch |
| st | Stitch |
| sts | Stitches |
| rnd | Round |
| BLO | Back loop only |
| FO | Fasten off |
| MR | Magic ring |
If you are used to UK terms, note that US single crochet is UK double crochet. Everything else in this pattern reads the same in both systems.
Pattern Notes
Nine notes to read once before you start. Understanding these will prevent most beginner mistakes.
1. The whole pumpkin is worked in a continuous spiral. You do not join with a slip stitch at the end of each round. You do not chain up. You simply keep working into the next stitch and the next and the next. This produces a smoother finish than joining at the end of each round.
2. Mark the first stitch of every round. Move your marker up as you complete each round. Without this, you will lose track of where you are within five rounds. When your marker is at the beginning of a round, count backward to make sure you have the right stitch count from the round before.
3. The stitch count at the end of each line in bold is what you should have. Count it. A round that comes out one stitch off will look fine and will still throw the ribs out of place later. Every round in this pattern has a specific count for a reason.
4. Increases must be worked exactly where the pattern says. If you put all your increases in the same six positions on every round, you will get a hexagonal circle with six visible corners instead of a smooth round shape. Following the pattern exactly produces a proper circle.
5. Do not skip the back loop only round. The single round of BLO stitches (Round 8) is what makes the pumpkin fold at the transition from the flat top to the straight sides. Without it, you get a soft slope instead of a defined shape, and the finished pumpkin will look droopy.
6. Stuff the pumpkin firmly before you close it. Half-stuffed pumpkins look sad and sag. Push the fiberfill in through the opening in small handfuls, using the end of a pencil or a chopstick to work it into the corners. Keep going until the pumpkin feels solid but still gives slightly when you press it.
7. Leave long tails at the start and finish. You need the magic ring tail to weave the end into the pumpkin, and you need the final tail to close the bottom. Cut them at least 30 cm (12 inches) long.
8. Weave in ends before you make the ribs, not after. Ends woven in after ribbing are much harder to hide because the ribs pull the fabric taut and expose any loose ends. Weave them in when the pumpkin is a stuffed sphere.
9. The ribs are what makes it look like a pumpkin. They are also the part that beginners rush through. Take your time here. Mark your six positions before you start sewing, use a full length of yarn per rib (not a short piece), and pull each one to the same tension. This is the finishing touch that determines whether your pumpkin looks handmade in a good way or a bad way.
The Stitches You Need
Every stitch in this pattern is one of the five most basic crochet stitches. If you know these, you can make this pumpkin.
Chain (ch)
Make a slip knot on your hook. Yarn over the hook (wrap the yarn around it from back to front). Pull the yarn through the loop already on the hook. You have made one chain.
Chains are used to start most crochet projects and to move up between rows or rounds. In this pattern, chains are only used in the optional stem instructions.
Single Crochet (sc)
Single crochet is the shortest and most basic crochet stitch. Almost every stitch in this pumpkin is a single crochet.
To make one:
- Insert your hook into the next stitch (front to back).
- Yarn over and pull up a loop. You now have 2 loops on the hook.
- Yarn over and pull through both loops. You have made one single crochet.
Practice this stitch for a few minutes before starting the pumpkin. Aim for consistent tension so that all your stitches look the same size.
Increase (inc)
An increase adds one stitch to your total count. It is used in the top disc of the pumpkin to make the circle grow.
To make an increase:
- Work one single crochet into a stitch.
- Work a second single crochet into the same stitch.
Two stitches now stand where there was one before, and you have added one to your count.
Decrease (sc2tog)
A decrease removes one stitch from your total count. It is used in the bottom of the pumpkin to close it off.
There are several ways to work a decrease. The invisible decrease is the neatest and is worth learning.
Invisible decrease method:
- Insert your hook into the front loop only of the next stitch.
- Without yarning over, immediately insert your hook into the front loop only of the stitch after that. You have 3 loops on your hook.
- Yarn over and pull through the first 2 loops on your hook.
- Yarn over and pull through both remaining loops.
Two stitches have become one, and the decrease is nearly invisible in the fabric.
If you find this difficult, a standard decrease also works:
- Insert hook into the next stitch, yarn over, pull up a loop.
- Insert hook into the next stitch, yarn over, pull up a loop. You have 3 loops on the hook.
- Yarn over and pull through all 3 loops.
Slip Stitch (sl st)
The shortest of all crochet stitches. Used to move across stitches without adding height, and to finish a project neatly.
To make a slip stitch:
- Insert your hook into the next stitch.
- Yarn over and pull the yarn through both the stitch and the loop on your hook in one motion.
You have made a slip stitch. The stitch you just made barely rises above the surface of your work.
Magic Ring (MR)
The magic ring is how you start any circular crochet project. It creates an adjustable loop that you can pull tight after working stitches into it, which eliminates the small hole that appears when you start with a chain instead.
To make a magic ring:
- Drape the yarn over your hand so the tail hangs down and the working yarn (attached to the ball) crosses over the tail.
- Wrap the working yarn around your fingers to form a loose loop.
- Insert your hook into the loop, catch the working yarn, and pull it through so you have a loop on your hook.
- Chain 1 to secure the ring.
- Work the required number of single crochets into the ring, catching both the loop and the tail underneath.
- When you finish the required stitches, pull the tail firmly to close the ring. The stitches will draw together into a tight circle with no hole.
If you cannot get the hang of the magic ring, an alternative is to chain 2 and work all the stitches for Round 1 into the second chain from the hook. This produces a small hole in the center, but it works and it is easier for absolute beginners.
Back Loop Only (BLO)
A modification to a stitch, not a stitch itself. Instead of inserting your hook under both the front and back loops of a stitch, you insert it under only the back loop (the loop farther away from you).
This leaves the front loop visible as a horizontal ridge, and it makes the fabric fold cleanly at that point. Used exactly once in this pattern to define the edge between the top disc and the sides.
Making the Top Disc
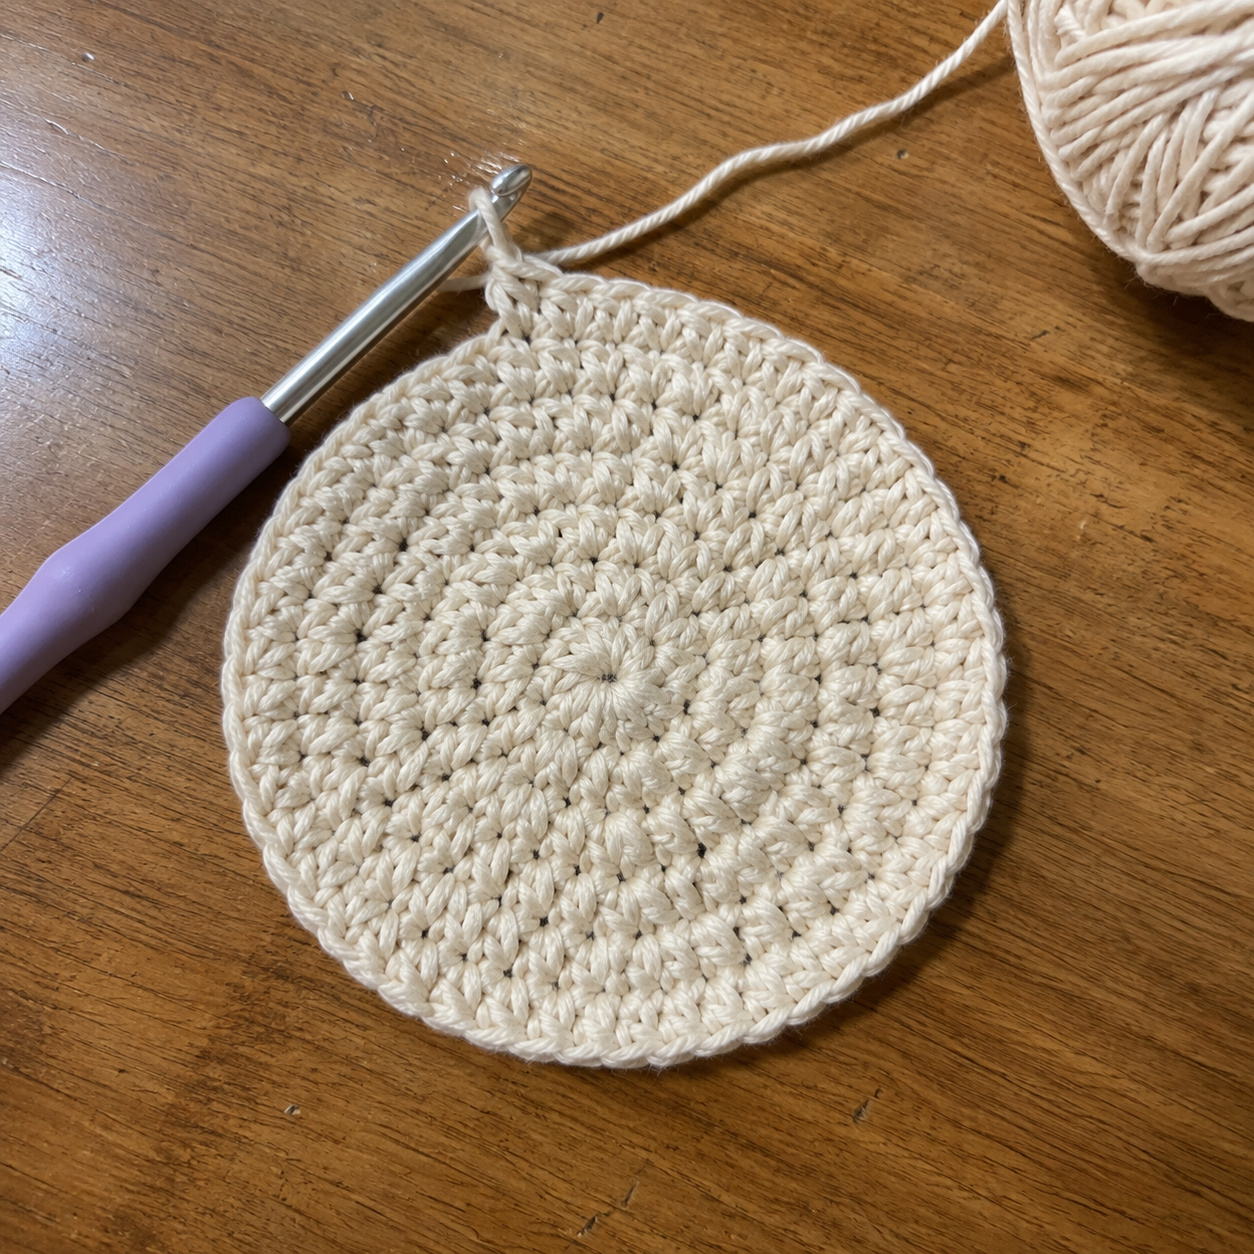
The top disc is the foundation of this crochet pumpkin pattern. It is the flat circle at the top of the pumpkin. It is the only shaped part of the entire pattern, and if you get this right, everything else is easy.
The Rule of Six
A flat circle in crochet grows by six stitches every round. This is not a suggestion, it is math. If you increase by fewer, your circle will cup up and become a bowl. If you increase by more, it will ripple at the edges and refuse to lie flat.
Every round of the top disc adds six new stitches, evenly spaced around the circle. The gap between the increases grows by one each round: zero on Round 1, one stitch between on Round 3, two on Round 4, and so on.
The Pattern for the Top Disc
Use worsted weight cotton in your chosen color. Hook size 5.5 mm.
Round 1: 6 sc in a magic ring. Pull the tail tight to close the ring. (6)
Round 2: Inc in each stitch around. (12)
Round 3: (Sc in next 1 st, inc) x6. (18)
Round 4: (Sc in next 2 sts, inc) x6. (24)
Round 5: (Sc in next 3 sts, inc) x6. (30)
Round 6: (Sc in next 4 sts, inc) x6. (36)
Round 7: (Sc in next 5 sts, inc) x6. (42)
Your top disc is now complete. It should measure about 10-11 cm (4 inches) across.
Checking Your Top Disc
Before you continue, check three things:
Is it flat? Lay the disc on a table. The edges should touch the table all the way around. If the disc cups upward like a bowl, your stitches are too tight. Continue anyway if it is only a small amount of cupping. If it is dramatic, unravel and start over with a bigger hook.
Is it circular? Look at the shape from above. It should be round, not hexagonal. If you see six flat sides and six corners, you stacked your increases too neatly. Do not worry about this on your first pumpkin because the ribs will hide it. Next time, do not restart your rounds at the same increase point.
Is it the right size? Measure across. It should be 10-11 cm (4 inches). If it is much smaller, your tension is too tight, and if it is much larger, too loose. Adjust hook size if needed.
Making the Sides
The sides of the pumpkin are the easiest part of the pattern. It is the same stitch, over and over, for about fifteen minutes.
The Transition Round
Between the flat top disc and the straight sides, there is one special round that turns the flat fabric upward and creates a clean folded edge.
Round 8: Sc BLO in each stitch around. (42)
Working in the back loop only for a full round creates a visible ridge on the outside of the pumpkin. This ridge is the fold line where the top meets the sides. Without it, the transition is soft and slopy.
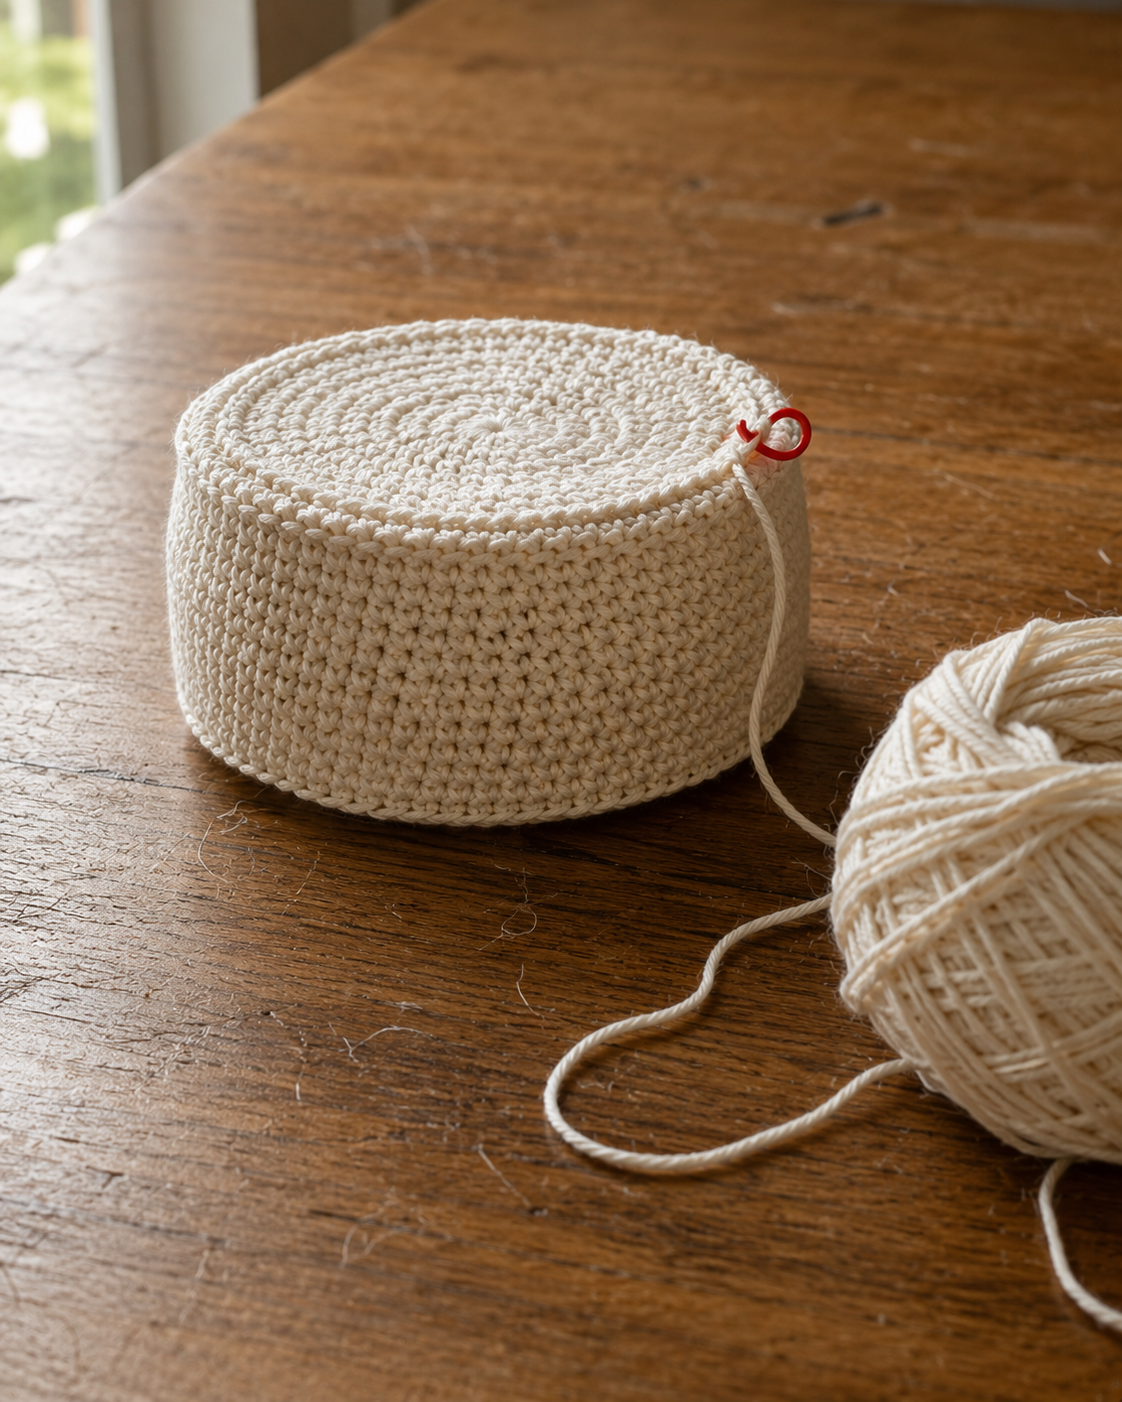
After Round 8, hold the pumpkin up and look at the outside. You should see a clean horizontal line running around it. This is the top edge of the pumpkin.
The Straight Sides
Rounds 9-16: Sc in each stitch around. (42) [8 rounds total]
You are working the same round eight times in a row. Each round is 42 single crochets, going around and around in a continuous spiral. There is no shaping, no increases, no decreases.
This is where you can zone out. Put on a show, listen to a podcast, and just keep making single crochets. Every so often, glance at your work to make sure you have not accidentally added or dropped a stitch.
After the eighth round of sides, the pumpkin body should look like a short, wide tube standing up on your table. The height of the sides is about 6-7 cm (2.5 inches).
Adjusting the Height
If you want a taller pumpkin, add more rounds here. Each extra round adds about 0.8 cm (a third of an inch) to the height. Six extra rounds gives you a distinctly tall pumpkin. Eight extra rounds and it starts to look more like a jar than a pumpkin.
If you want a squatter pumpkin, work fewer rounds. Six rounds instead of eight gives you a chunkier, more traditional pumpkin shape.
For the classic farmhouse look pictured in this pattern, eight rounds is the right amount.
Closing the Bottom
Now the pumpkin starts to take shape. The decrease rounds pull the bottom inward and eventually close it off completely.
The Decrease Pattern
Work each of these rounds carefully. The stitch count matters here because the decreases must land evenly around the pumpkin to close smoothly.
Round 17: (Sc in next 5 sts, sc2tog) x6. (36)
Round 18: (Sc in next 4 sts, sc2tog) x6. (30)
Round 19: (Sc in next 3 sts, sc2tog) x6. (24)
At this point, stop and stuff the pumpkin firmly.
Stuffing the Pumpkin
This is the moment where beginners often underdo it. A pumpkin that looks a little underfilled at this stage will look badly deflated after you close it and add the ribs.
Take small handfuls of polyester fiberfill and push them in through the opening. Use the eraser end of a pencil or a chopstick to work the stuffing into the corners and up against the sides. Keep going until the pumpkin feels firm to the touch but still gives a small amount when you squeeze it gently.
A properly stuffed pumpkin at this point should be able to sit on a table and hold its shape without sagging. If you can see gaps between the stitches when you look at the sides, add more stuffing.
Once you are satisfied, continue with the decreases.
Round 20: (Sc in next 2 sts, sc2tog) x6. (18)
Round 21: (Sc in next st, sc2tog) x6. (12)
Before Round 22, check the stuffing one more time. If the pumpkin has flattened at all in the process of decreasing, add a small amount more.
Round 22: (Sc2tog) x6. (6)
You are now down to just 6 stitches around a very small opening.
Sewing the Bottom Closed
Cut the yarn, leaving a tail of at least 30 cm (12 inches). Thread this tail onto your yarn needle.
Weave the needle through the front loop of each of the 6 remaining stitches, going around the opening. Pull the tail firmly and the opening will draw shut into a tight point.
Push the needle down through the closed point and out through the top of the pumpkin. Pull firmly, tie a small knot against the fabric to secure it, and then push the needle back down through the pumpkin and out through a random point on the side. Trim the tail close to the fabric. The end will disappear inside the pumpkin.
Do the same with the tail from your original magic ring, weaving it into the top of the pumpkin and hiding it inside.
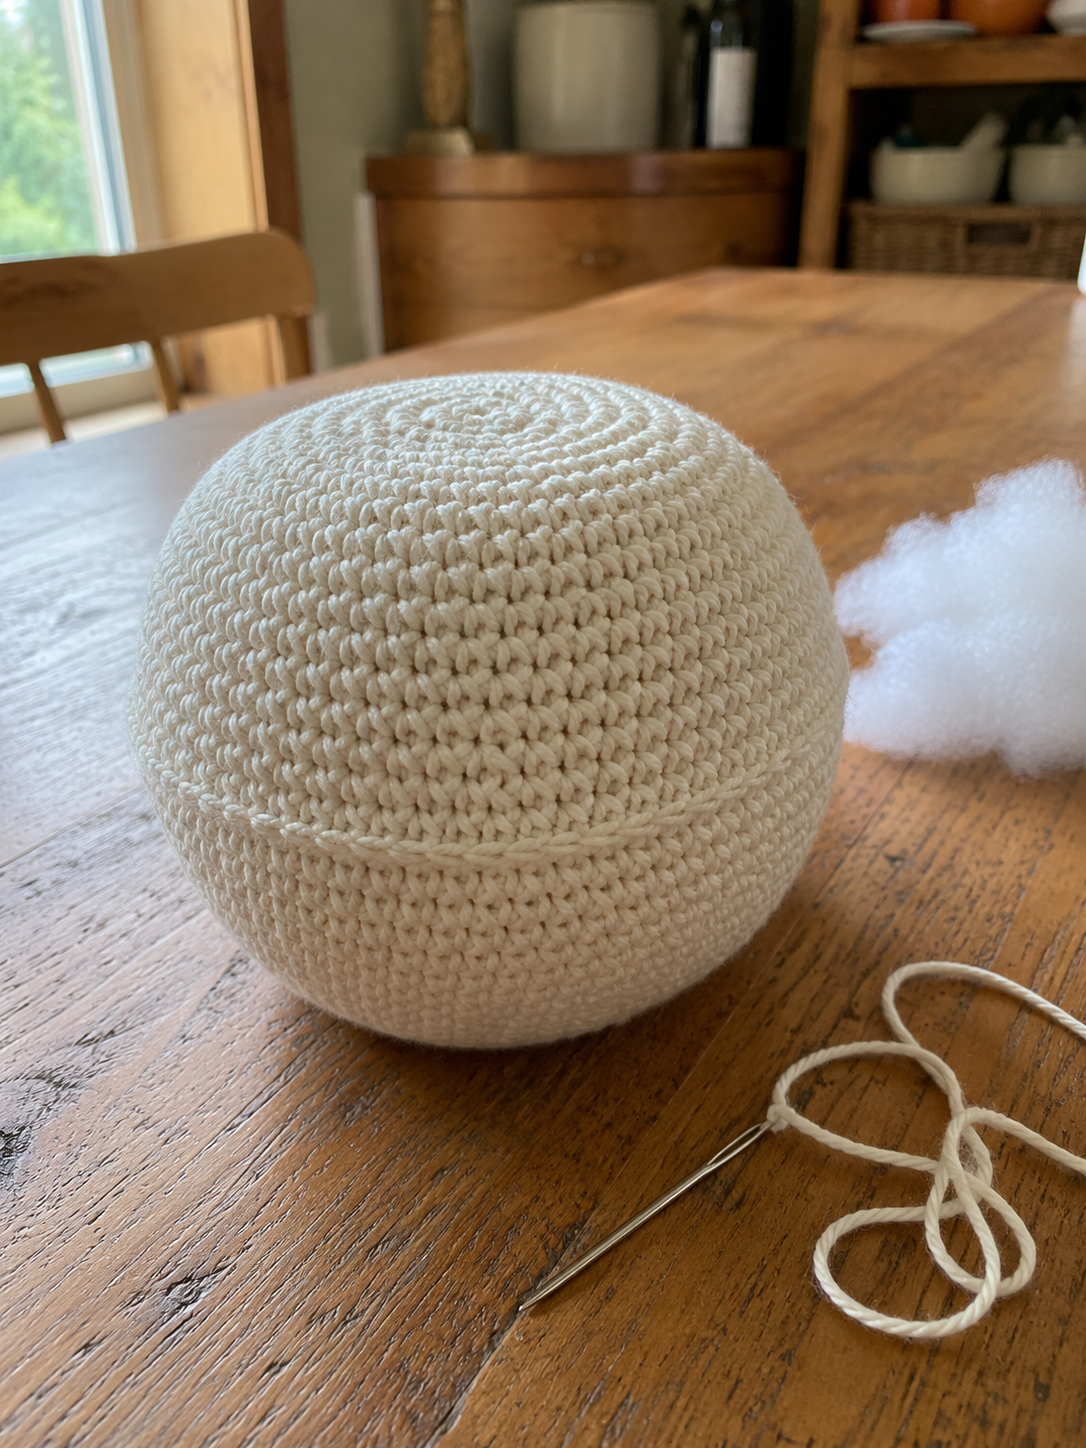
Your pumpkin is now a stuffed sphere with a defined top and bottom. It should stand up on the flat top disc and feel firm to the touch.
Adding the Ribs
The ribs are what makes this crochet pumpkin pattern actually look like a pumpkin. They are the finishing touch that turns a stuffed ball into a recognizable pumpkin.
Preparing to Rib
Before you thread your needle, mark the six rib positions on your pumpkin. You want the ribs evenly spaced around the pumpkin, and it is much easier to see where they should go before you start sewing than to adjust once you have already made one.
Method one: use a fabric marker. Lightly mark six evenly-spaced points around the top edge of the pumpkin (the folded ridge from Round 8). The marks will wash out later if you spot-clean the pumpkin.
Method two: use small pieces of contrast yarn. Tie six short pieces of yarn to the top edge at evenly-spaced points. Remove them after you finish ribbing.
To divide the top edge into six equal parts, look for the increase points from your top disc. You made your last increase on Round 7 in six positions around the disc. Those six positions are where the ribs should go.
Alternatively, imagine the pumpkin from above as a clock face. Mark the twelve o’clock, two o’clock, four o’clock, six o’clock, eight o’clock, and ten o’clock positions.
The Ribbing Technique
Cut a length of yarn about 100 cm (40 inches) long in the same color as your pumpkin. Thread it onto your yarn needle.
Step 1: Push the needle up through the center bottom of the pumpkin (where you closed it) and out through the center top (through the very center of your top disc). Pull the yarn most of the way through, leaving a short tail of about 10 cm at the bottom.
Step 2: Wrap the yarn down the outside of the pumpkin, following one of your marked lines. Push the needle back into the center bottom of the pumpkin at the same point where you started, and back out through the center top again.
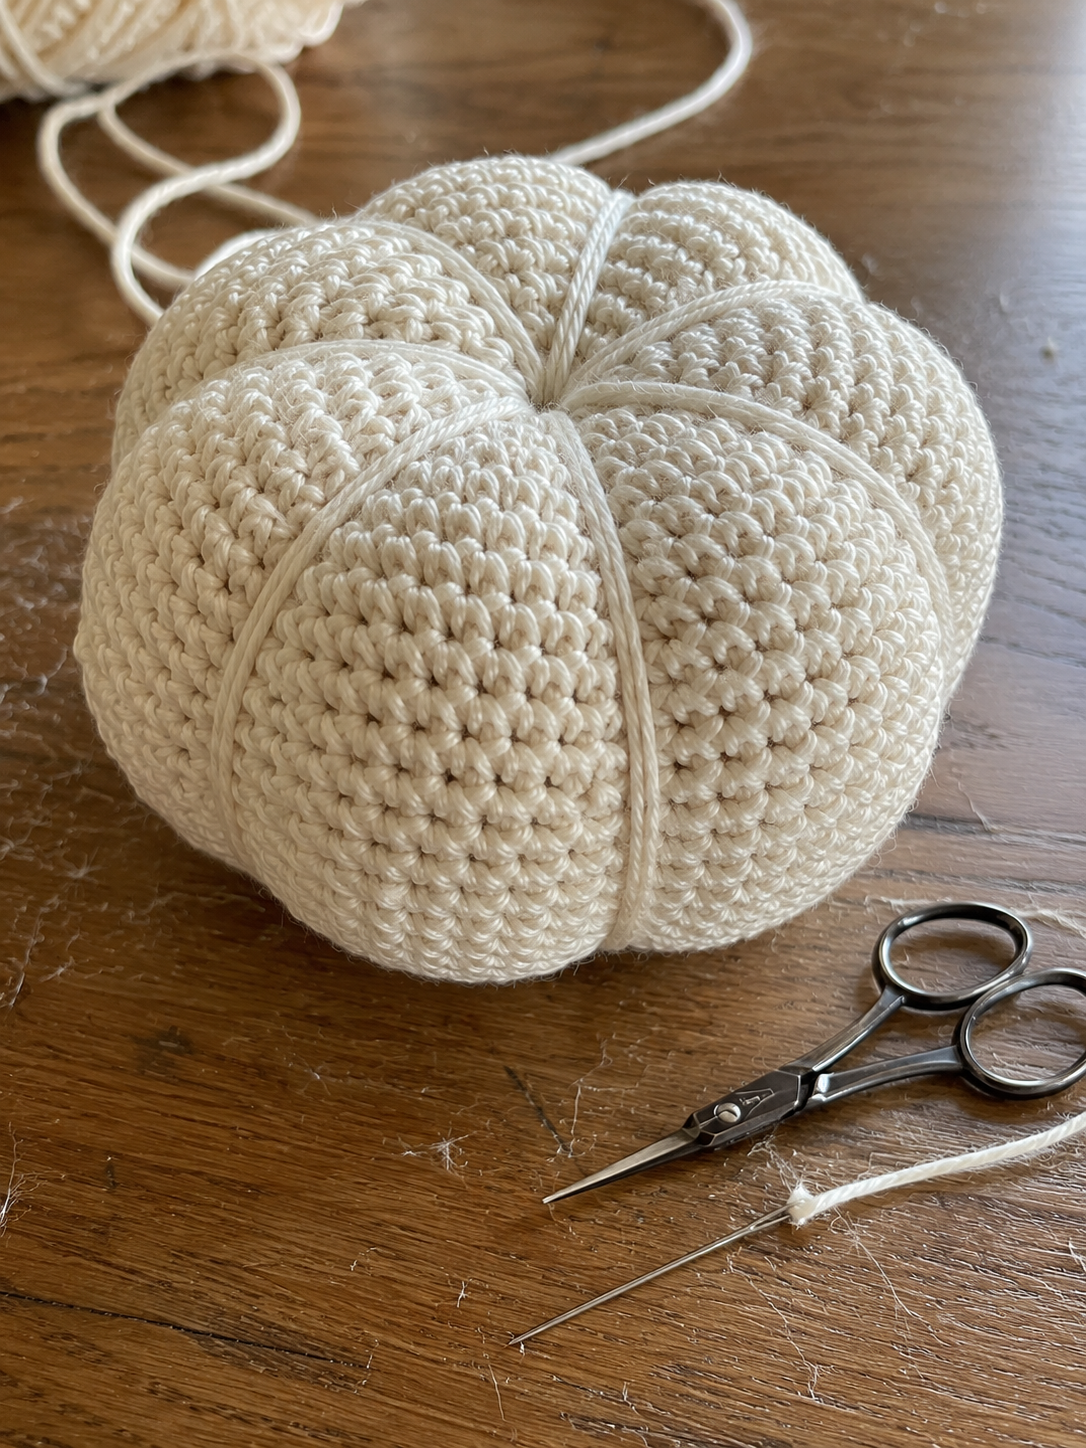
Pull the yarn firmly. You have made one rib. You should see a visible indent running down the side of the pumpkin along your marked line.
Step 3: Repeat for the other five ribs. Each time, push the needle down along the outside of the pumpkin at the next marked position, back through the bottom center, and up through the top center.
Pull each rib to the same tension. If you pull some tight and some loose, the pumpkin will look lopsided. A good rule is to pull just firmly enough that the rib creates a clear indent but not so tight that the fabric puckers around it.
Step 4: After you have made all six ribs, tie the working yarn to the starting tail at the bottom of the pumpkin. Push the needle back up through the pumpkin and out through the side, trim close, and hide the ends.
Adjusting the Rib Depth
For a subtle, modern look, pull the ribs less tight. The pumpkin will look softly segmented.
For a chunky, farmhouse look, pull the ribs firmly. The pumpkin will have deep valleys between pronounced segments.
For a rustic, textured look, use a slightly different color or a thicker strand of yarn (two strands held together) for the ribs. They will stand out against the base color.
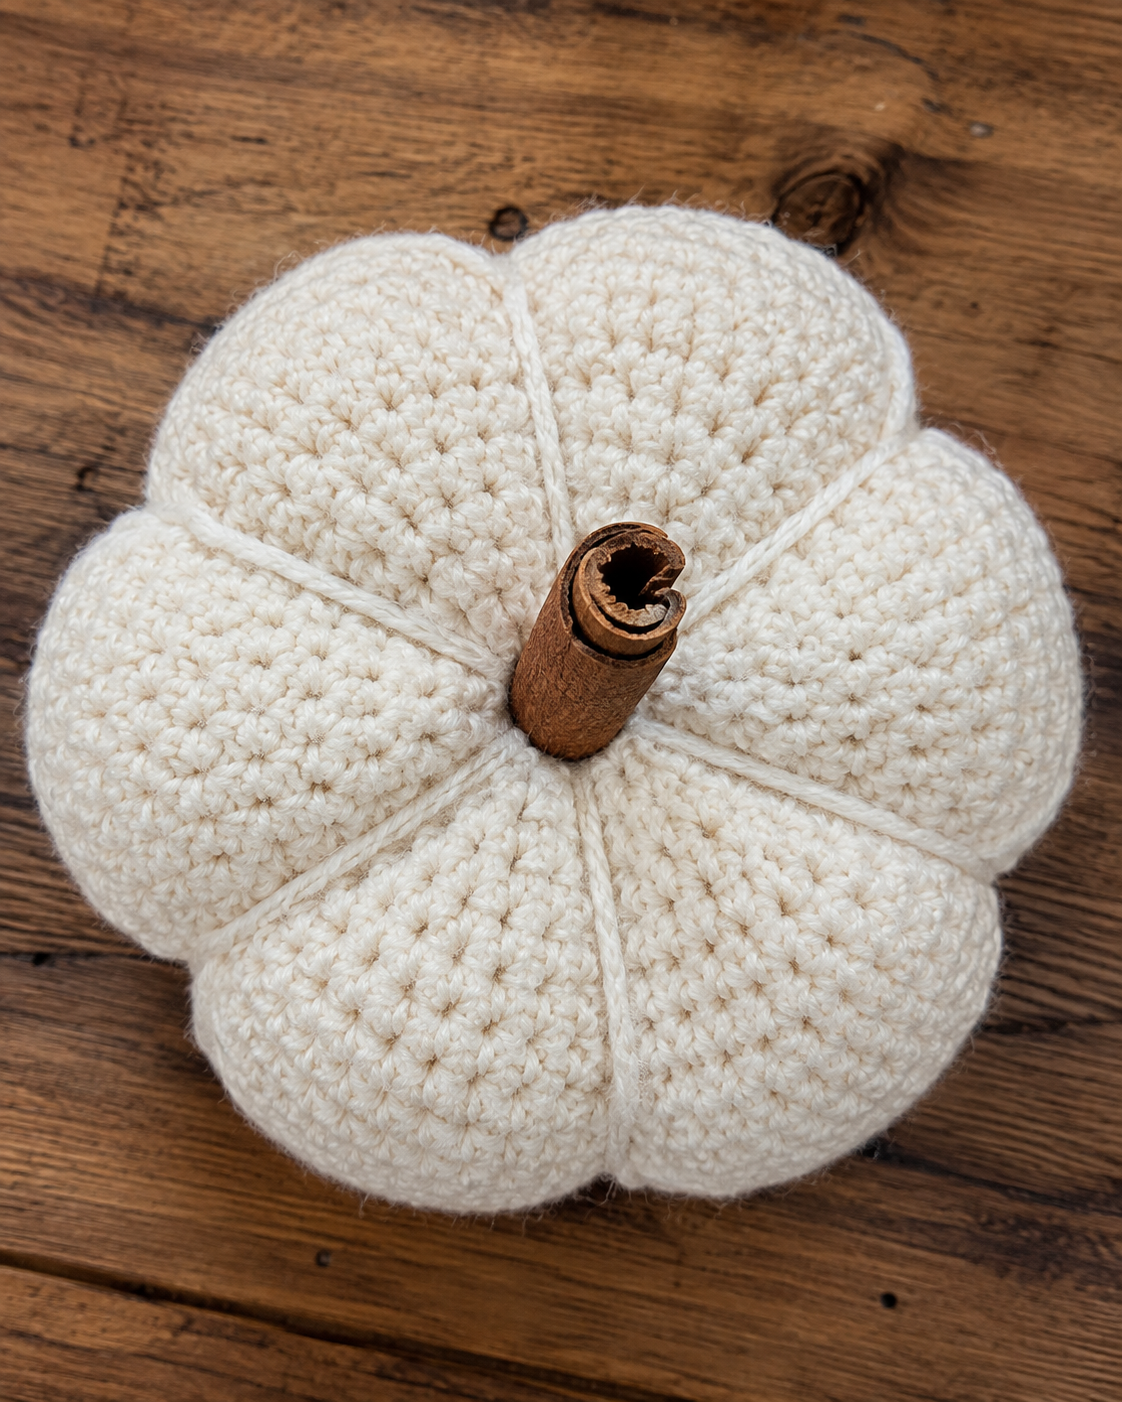
For the classic look pictured in this pattern, pull the ribs to moderate tension with the same color yarn.
Making the Stem
The stem is what makes it look like an actual pumpkin instead of a striped ball. You have three main options.
Option 1: Real Cinnamon Stick
This is the classic choice and the easiest. Break a whole cinnamon stick to about 4-5 cm (1.5-2 inches) long. Push it firmly into the center of the top disc, right where all the increases meet.
If it feels wobbly, add a small amount of hot glue at the base to hold it in place.
Cinnamon sticks smell wonderful for the first few weeks and add a rustic touch. They also add real weight to the top of the pumpkin, which helps it sit stable on a shelf.
Option 2: Small Twig
Find a small twig from your yard, about the thickness of your little finger and 4-5 cm long. Clean it, let it dry completely, and push it into the top of the pumpkin.
Twigs give a more natural, foraged look than cinnamon sticks. They also cost nothing.
Option 3: Crochet Stem
If you want a fully crochet pumpkin, make a stem from brown or beige yarn.
Using brown or beige worsted weight yarn and a 5.5 mm hook:
Round 1: 5 sc in a magic ring. Pull tight. (5)
Round 2: Sc in each st around. (5)
Rounds 3-6: Sc in each st around. (5) [4 more rounds, 6 total]
Cut the yarn leaving a 20 cm tail. The stem is now a small tube about 3 cm tall.
Stuff the stem lightly, then sew it to the top center of the pumpkin using the tail and your yarn needle. Sew all the way around the base of the stem, making sure it sits firm and does not wobble.
For a curved or bent stem, sew it at an angle. For a straight-up stem, sew it centered.
Attaching Any Stem
Wherever your stem comes from, it needs to be secured firmly. A wobbly stem looks unfinished.
For real cinnamon sticks or twigs, add a drop of hot glue at the base after inserting.
For crochet stems, sew them down thoroughly with several stitches around the base.
For a natural touch, wrap a small piece of twine or leather cord around the base of the stem where it meets the pumpkin. This hides any imperfection in the attachment and looks intentional.
Optional: Adding a Leaf
A small leaf next to the stem adds an extra bit of realism and looks beautiful on cream or white pumpkins. This is entirely optional.
The Leaf Pattern
Using sage green, olive green, or brown yarn and a 5.5 mm hook:
Chain 8.
Row 1: Skip the first chain. Sl st in the next ch, sc in next ch, hdc (half double crochet) in next 2 ch, sc in next ch, sl st in last ch. Do not turn.
Row 2: Working along the opposite side of the starting chain, sl st in the first ch, sc in next ch, hdc in next 2 ch, sc in next ch, sl st in last ch.
Fasten off and leave a 20 cm tail for sewing.
Half Double Crochet (hdc)
If you have not used hdc before, here is how:
- Yarn over.
- Insert hook into the next stitch.
- Yarn over and pull up a loop. You have 3 loops on the hook.
- Yarn over and pull through all 3 loops in one motion.
You have made one half double crochet, which is taller than a single crochet but shorter than a double crochet.
Attaching the Leaf
Position the leaf next to the base of the stem. Sew it in place through the pointed end using the yarn tail, taking small stitches to secure it firmly.
Leave the leaf sticking out at an angle rather than lying flat against the pumpkin. This looks more natural.
Putting It Together
Your pumpkin is now complete. Take a moment to look at it and check three things.
Is the pumpkin round and full? If it looks deflated or if you can see any gaps between stitches, you may need to add more stuffing. Find a small opening between stitches, push more fiberfill in, and close the opening with a stitch or two.
Are the ribs even? Look at the pumpkin from directly above. The six ribs should divide the pumpkin into six equal sections. If one section is much bigger than another, you can adjust by undoing that rib and re-sewing it in the correct position.
Is the stem secure? Wiggle the stem gently. It should not move at all. If it does, add another stitch or a drop of glue.
If all three check out, your pumpkin is finished.
Variations
Same construction, completely different pumpkins.
The Small Pumpkin
Follow the exact same pattern but stop increasing after Round 5 (30 stitches). Continue with 5 rounds of sides instead of 8, and decrease as written, starting from the appropriate count. Your finished pumpkin will be about 6-7 cm across.
Uses about 25 grams of yarn and takes about 45 minutes.
The Large Pumpkin
Follow the pattern but continue increasing for two more rounds beyond Round 7:
Round 8: (Sc in next 6 sts, inc) x6. (48)
Round 9: (Sc in next 7 sts, inc) x6. (54)
Then work the BLO round with 54 stitches and continue with 10 rounds of sides instead of 8. Decrease with appropriate proportions.
Uses about 80 grams of yarn and takes about 3 hours.
The Two-Color Pumpkin
Work the entire pumpkin in your main color, then use a contrast color for the ribs. The contrast ribs stand out beautifully and add visual interest.
Try cream with rust ribs, sage with brown ribs, or white with gold thread ribs (metallic embroidery thread).
The Textured Pumpkin
Instead of plain single crochet on the sides, work in a bobble stitch, puff stitch, or crossed stitches for a more elaborate texture. This is more difficult and slower to work, but produces a stunning finished piece.
The Velvet Pumpkin
Use velvet or chenille yarn instead of cotton. The finished pumpkin looks luxurious and store-bought quality. Velvet yarn is harder to work with (the stitches are difficult to see), so start with a small pumpkin.
The Rustic Yarn-Wrapped Pumpkin
For a very different look, crochet the pumpkin as written but leave the ribs plain. Instead of ribs, wrap the pumpkin in twine, jute, or a strip of burlap for a completely different rustic aesthetic.
The Halloween Jack-o-Lantern
Make the pumpkin in orange, then embroider a face with black yarn. Traditional triangle eyes and a jagged smile work well. Keep the face simple, larger than you think.
Washing and Care
A well-made crochet pumpkin can last for years if you treat it right.
Cleaning
For small marks and everyday dust, spot clean with a damp cloth. Do not soak the pumpkin.
For heavier cleaning, hand wash in cool water with a small amount of mild soap. Gently squeeze out the water without wringing. Reshape the pumpkin by hand while damp, and let it air dry completely.
Never machine wash or tumble dry a crochet pumpkin. The stuffing will clump and the shape will be permanently distorted.
Storage
At the end of the fall season, store your pumpkins in a dry container with a lid. A plastic bin or a shoebox both work.
Do not compress them under other items. The ribs and shape can get flattened over months of storage.
Add a fabric softener sheet or a small sachet of dried lavender to the container to keep the pumpkins smelling fresh and to deter any moths (especially important for wool pumpkins).
Fading
Cotton and wool both fade over time when exposed to sunlight. Do not display your pumpkins in a spot that gets direct afternoon sun for weeks at a time. A shaded shelf or a spot under artificial light preserves the colors longer.
Common Problems
Every crochet pumpkin pattern has its tricky spots. Here are the most common issues beginners run into, and how to fix them
The top disc will not lie flat. Your stitches are too tight or too loose. If it cups upward, go up half a hook size. If it ripples at the edges, go down half a hook size.
The pumpkin looks lopsided after ribbing. One rib was pulled tighter than the others. Undo the tightest rib, redo it at the same tension as the others.
The ribs are in the wrong place. You did not mark the positions before starting. Undo all six ribs, mark six evenly-spaced positions, and redo them.
The bottom will not close smoothly. You skipped a decrease or added extras. Undo the last few rounds and recount. Follow the pattern exactly.
The pumpkin sags to one side. Underfilled. Find an inconspicuous spot, open a small gap between stitches, add more stuffing, and close the gap.
The stem falls out. Not secured firmly enough. Add hot glue at the base or sew it down with several stitches through the base.
Stitches are visible even through the ribs. Your gauge is too loose. Use a smaller hook or a heavier yarn for next time. For the current pumpkin, add more stuffing to fill out the fabric.
The pumpkin looks flat rather than round. Not enough stuffing. Open a small gap, add more, close it up.
The color looks dull compared to the yarn label. Cotton yarn shows its color differently once stitched. This is normal and does not indicate a problem.
My pumpkin looks nothing like the photos. Take a photo of your pumpkin and compare it to the reference photos. Usually the issue is one of: ribs pulled too tight (making the pumpkin lumpy), understuffed (making it flat), or the top disc is too small or too large (making the proportions off). Any of these can be identified and fixed.
Quick Reference Sheet
The entire pattern on one page. Print this and keep it with you while you work.
Materials
- Worsted weight cotton yarn (45g)
- 5.5 mm crochet hook
- Yarn needle
- Stitch marker
- Polyester fiberfill
- Cinnamon stick or crochet stem
- Scissors
Pattern Summary
Top Disc (Rounds 1-7):
- 6 sc in MR (6)
- Inc around (12)
- (sc, inc) x6 (18)
- (sc 2, inc) x6 (24)
- (sc 3, inc) x6 (30)
- (sc 4, inc) x6 (36)
- (sc 5, inc) x6 (42)
Transition (Round 8): 8. Sc BLO in each st (42)
Sides (Rounds 9-16): 9-16. Sc in each st (42) [8 rounds]
Bottom Decrease (Rounds 17-22): 17. (sc 5, sc2tog) x6 (36) 18. (sc 4, sc2tog) x6 (30) 19. (sc 3, sc2tog) x6 (24) STUFF HERE 20. (sc 2, sc2tog) x6 (18) 21. (sc 1, sc2tog) x6 (12) 22. (sc2tog) x6 (6)
Close with tail, weave in ends.
Finishing
- Add 6 ribs, evenly spaced
- Attach stem (cinnamon stick, twig, or crochet)
- Optional leaf
Yardage
- About 45 grams of worsted weight yarn
- Optional: 5 grams of contrast yarn for stem or leaf
Make It Your Own
A single crochet pumpkin is beautiful. A set of them is a statement.
Group Displays
Three pumpkins in different sizes and colors, arranged on a mantel, create a farmhouse fall vignette that would sell for over a hundred dollars in a boutique. Try:
Trio A: Cream medium, cream small, and rust large.
Trio B: Sage medium, cream small, and dusty pink small.
Trio C: All three in white in graduated sizes.
Selling Your Pumpkins
If you want to sell your pumpkins on Etsy, at a market, or through a local shop, here are considerations.
Time: Each medium pumpkin takes about 2 hours. Small pumpkins take 45 minutes. If you want to make a profit, price at least at your local minimum wage per hour of work, plus materials.
Materials cost: About $3-5 per pumpkin depending on your yarn cost.
Selling price: Handmade crochet pumpkins typically sell for $15-45 depending on size and quality. Sets of three sell for $50-90.
Photography matters: A pumpkin photographed on a wooden crate with dried wheat looks worth $40. The same pumpkin photographed on a white background looks worth $8. Style your photos to justify your price.
Gifting
A single crochet pumpkin in a gift box with a small card explaining that it’s handmade is a thoughtful hostess gift for Thanksgiving. A set of three in a decorative basket is a beautiful birthday gift for someone who loves fall decor.
Save This Pattern for Later
Bookmark this crochet pumpkin pattern, or pin one of the pattern images to your Pinterest boards so you can find it easily. Come back for more free crochet patterns as fall continues, and stay tuned for our step-by-step Christmas ornament patterns coming in October.
Happy crocheting.
Frequently Asked Questions
How long does it take to crochet a pumpkin?
A medium pumpkin (the size in this pattern) takes about 1.5 to 2 hours for a comfortable beginner. Small pumpkins take about 45 minutes to an hour. Large pumpkins take 2.5 to 3 hours. Once you have made one or two, your speed will improve significantly.
Can absolute beginners follow this pattern?
Yes. Every stitch in this pattern is basic (chain, single crochet, increase, decrease, slip stitch), and all six of the ribs are added with a yarn needle rather than crocheted. If you have never crocheted before, spend an afternoon on YouTube learning the basic stitches, then come back to this pattern.
What is the best yarn for crochet pumpkins?
Worsted weight cotton (labeled size 4 or medium) in 100% cotton is the best choice. It has clean stitch definition, holds its shape well, and looks premium. Acrylic works as a cheaper alternative but does not hold its shape as long. Wool gives a softer, cozier look. Avoid bulky yarn (produces a much larger pumpkin) and novelty yarns (harder to work with).
How much yarn does one pumpkin use?
A medium pumpkin uses about 45 grams of yarn. A standard 100-gram skein of yarn will make two medium pumpkins with yarn left over, or one large pumpkin. Small pumpkins use only 25 grams each.
What can I use for the pumpkin stem?
The four best options are: real cinnamon sticks (classic and easy), small twigs from your yard, a piece of driftwood or wooden dowel, or a crochet stem made from brown yarn. Cinnamon sticks are the most popular because they smell wonderful and add real weight to help the pumpkin stay upright.
Why does my pumpkin look flat instead of round?
Almost always because it is under-stuffed. Push more polyester fiberfill in through the bottom before you close it up, and check that the sides feel firm rather than squishy. A well-stuffed pumpkin holds its shape without any give.
Why are my ribs uneven?
Because they were not evenly spaced before you started sewing. Next time, mark six evenly-spaced positions around the top of the pumpkin using a fabric marker or small pieces of contrast yarn before you thread your needle. Also, pull each rib with the same amount of tension so they all indent the same amount.
Can I make this pumpkin without a magic ring?
Yes. If you cannot get the hang of a magic ring, chain 2 instead. Work all 6 single crochets for Round 1 into the second chain from the hook. This leaves a small hole in the center that is easy to close with a stitch or two after you finish the pumpkin.
Can I sell finished pumpkins made from this pattern?
Yes. This pattern is free to use for personal projects and for selling the finished handmade items you make. You can sell them at markets, on Etsy, on social media, or through a local shop. What you cannot do is copy and republish this written pattern as your own.
How do I clean a crochet pumpkin if it gets dirty?
Spot clean with a damp cloth for small marks. For heavier cleaning, hand wash in cool water with a small amount of mild soap. Squeeze (do not wring) out the water, reshape by hand, and lay flat to dry. Never machine wash and never tumble dry, or the stuffing will clump and the pumpkin will be permanently distorted.
How do I store my pumpkins between seasons?
Put them in a lidded plastic bin or sturdy shoebox in a dry place. Do not compress them under heavy items. Add a fabric softener sheet or lavender sachet to keep them smelling fresh. If you used wool yarn, add cedar chips to deter moths.
Can I make a set of matching pumpkins?
Yes, and a matched set looks much more impressive than a single pumpkin. Try three pumpkins in the same color at different sizes, or three pumpkins at the same size in coordinating colors (like cream, sage, and dusty pink). Buy all your yarn from the same dye lot for a truly matched set.
